Every step required to set up your new OutboundSync account.
This guide is broken into two major steps:
- Initial setup: Connect your accounts and set your routing policy.
- Final steps: Verify the sync is live and enable visibility in your account.
Initial setup
Connect your HubSpot account
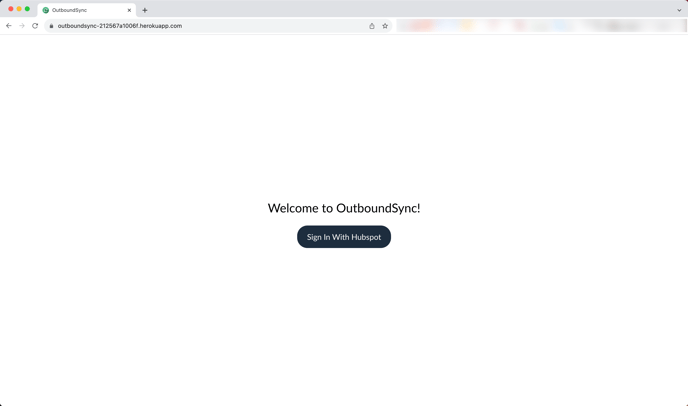
First, have your administrator log in to the OutboundSync app, where you will connect through your HubSpot account:
https://outboundsync-212567a1006f.herokuapp.com/
Then approve permissions for OutboundSync to be able to access your HubSpot account.
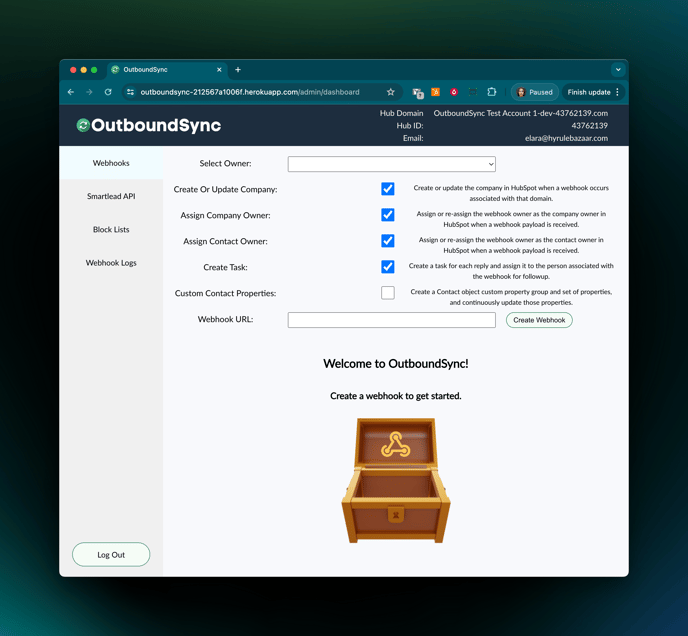
Once you're logged in, you will see that you don't have any webhooks created yet. You must create a webhook and attach it in Smartlead to start syncing your data.
Determine your routing policy
Currently, OutboundSync allows you to generate unique webhooks for each user in your HubSpot account. This means you have two options.
- Route in HubSpot. Generate a single webhook for your entire account. You will create dedicated workflows in HubSpot to route the leads once they're synced to HubSpot via OutboundSync.
- Route by Webhook. Generate a webhook for each member of your team. In this case, they will attach their webhook to their campaigns in Smartlead and handle routing "upstream" before it arrives in HubSpot.
While it depends on your use case, most users choose to route in HubSpot.
Generate and copy your first webhook URL
OutboundSync will prompt you to make the following selections:
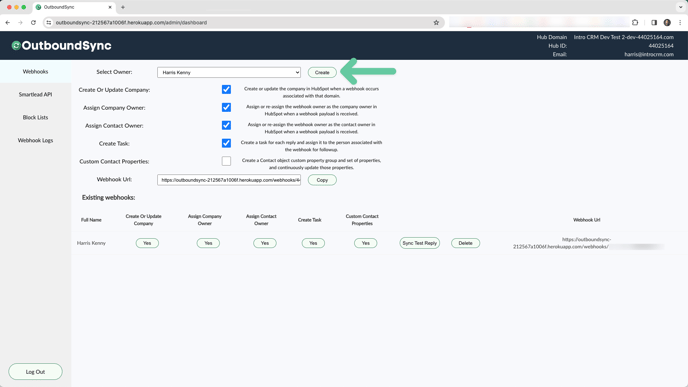
Select Owner: Select the HubSpot user you want to associate the webhook with. This list will be pulled from your HubSpot account.
Create Or Update Company: Create or update the company in HubSpot when a webhook occurs associated with that domain.
Assign Company Owner: Assign or re-assign the webhook owner as the company owner in HubSpot when a webhook payload is received.
Assign Contact Owner: Assign or re-assign the webhook owner as the contact owner in HubSpot when a webhook payload is received.
Custom Contact Properties: Create a Contact object custom property group and set of properties, and continuously update those properties.
Then Create a webhook URL for the HubSpot contact. Note you can change these settings later by clicking the corresponding button below after you've created your webook.
You must click Create to activate and use your webhook.
Once the webhook is created, you will see it on the screen.
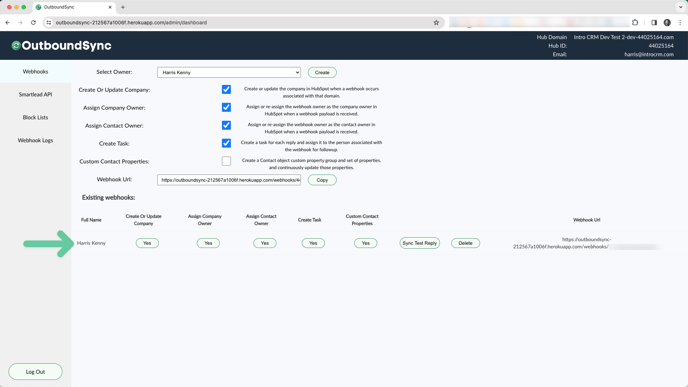
Send a test webhook
We'll see this in HubSpot later. But while we're here in OutboundSync, click the Test button to send a test webhook over to your HubSpot account.

Determine your Smartlead webhook policy
Now you need to decide how you want to set your newly created webhook in Smartlead. Smartlead provides two ways of doing this.
- Create a Client webhook. Generate a single webhook for your entire account by creating a Client. You can do this by creating a ghost or dummy client account for yourself. This way, every time you run a campaign, you can attach yourself as a client and use the same webhook.
- Add a webhook to each campaign. Alternatively, you can generate one or multiple webhooks and attach them to each campaign. This is more manual and generally not advised unless you have campaigns dedicated to each sales rep.
While it depends on your use case, most users choose to create a Client webhook.
Add webhooks to SmartLead
Create a Client webhook
1. Head over to your SmartLead account settings
2. Select "Webhook" from the left sidebar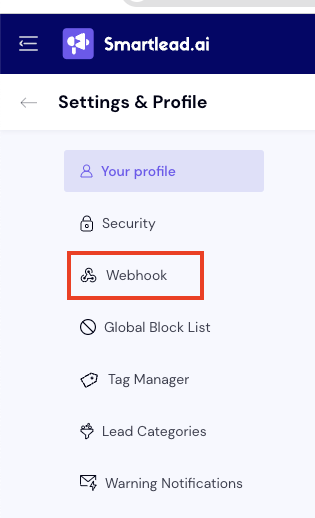
3. Click on "Add Webhook"
Add a webhook to each campaign.
If you decide to add the webhook/s generated via OutboundSync to each of your SmartLead campaigns, then follow the below steps:
1. After you have created your campaign, access your campaign settings
2. navigate to "Webhooks"
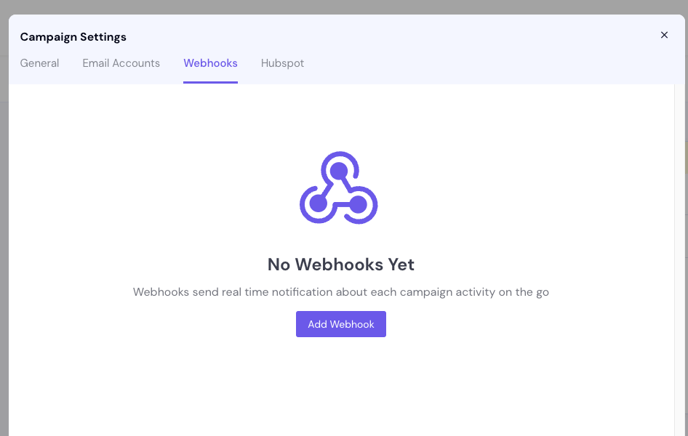
3. Click on "Add webhook"
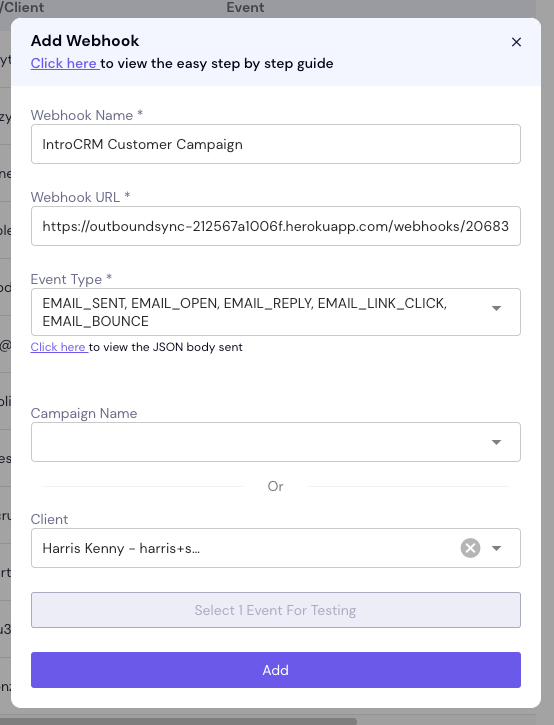
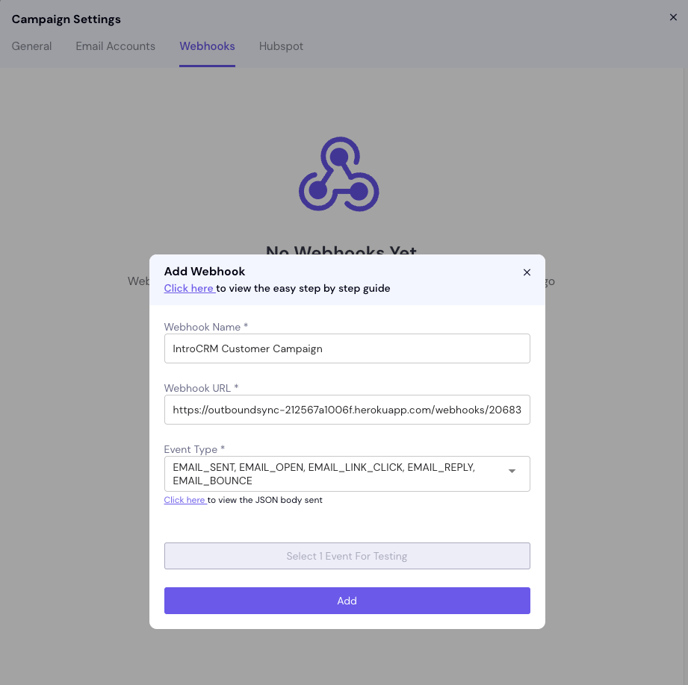
4. Paste the webhook generated in the previous steps into your view. Give your campaign a name and select what you would like to track(for example, email replies, clicks, opens, bounces etc..)
Final Steps
See synced emails
Once you have campaigns in Smartlead, you should start seeing emails logged in your timeline.
Emails are synced at the Contact- and Company-level. This is possible because OutboundSync handles associations for you automatically.
Remember the test webhook we sent earlier? We're getting back to that now. If you have notifications enabled for new company and contact assignment, you may have already received an email about the company/contact created by the test webhook.
Start with a contact that you know was enrolled in a sequence. Start by going to Contacts > Contacts in the top menu or simply search for the contact in the search bar.
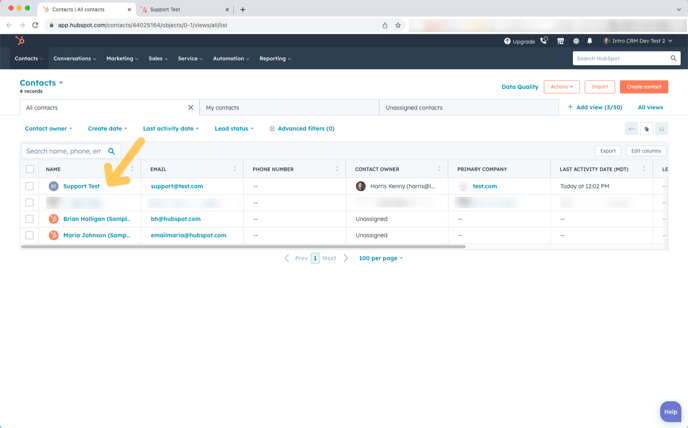
Then go to the individual contact record for that person.
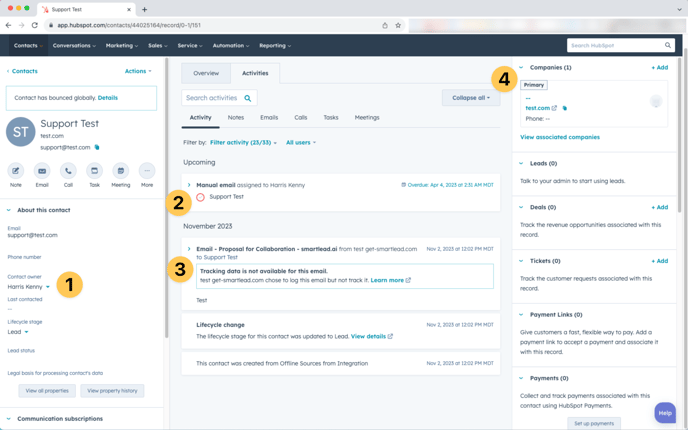
You will see that by default, OutboundSync is doing the following:
- Assigning the contact owner, per the webhook you created.
- Creating a task to follow up—this only applies to replies by default.
- Logging the email with the from and to fields set so you can reply.
- Creating and associating a company by default.
Next, we will enable the activities filter. This will pull all the additional data that we're getting from your sales engagement platform (SEP) so they're visible in your HubSpot account.
Enable OutboundSync Filter activity
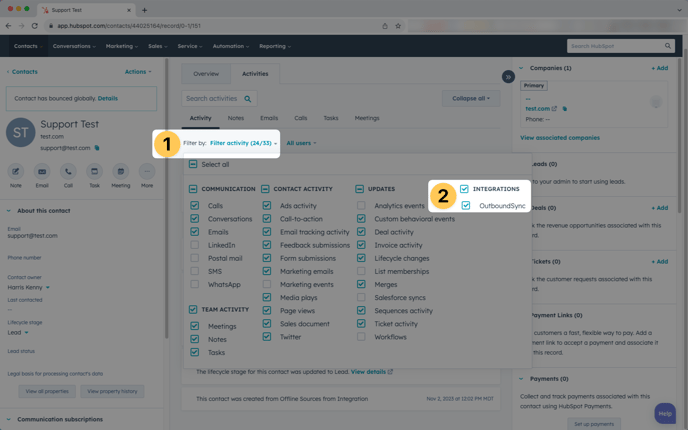
There is currently no global way to set Filter activity. This means you must enable it in each user account in HubSpot that wants to see OutboundSync activity in their timeline.
First, go to any individual contact record in your HubSpot portal by going to Contacts > Contacts in the top menu.
Then, go to the Activities tab and click the Filter activity menu.
Make sure that the OutboundSync box is checked under Filter activity when you’re logged in. Go to a contact record, click Filter activity, then check off OutboundSync:
Now that these have been enabled, see what the record looks like:
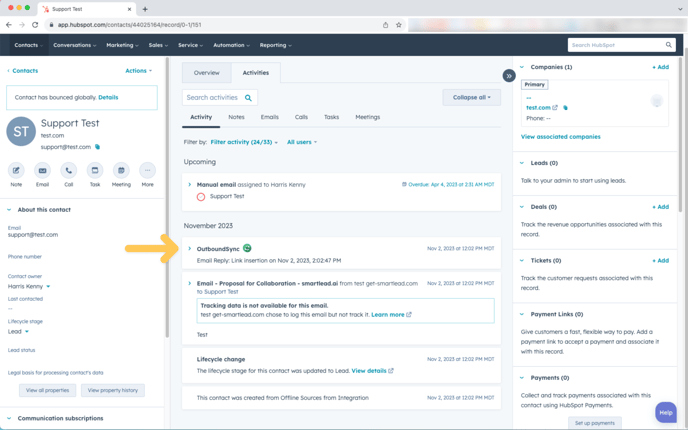
You click that timeline event to see more information.
More examples of synced records
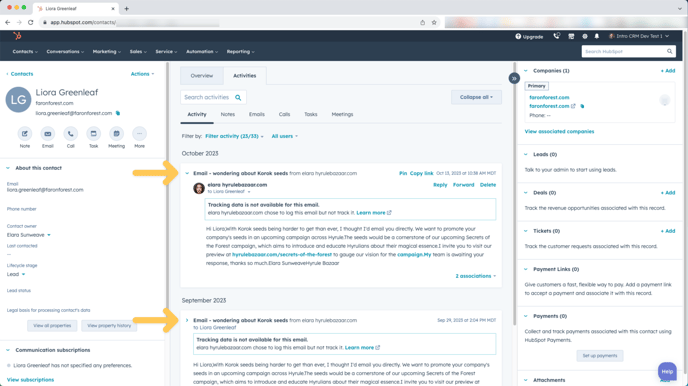
Here's an example of what synced sent emails and replies should look like in a Contact record when Filter activity is not enabled:
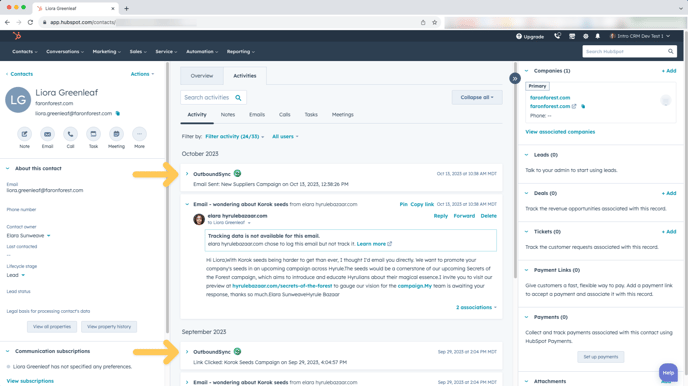
With Filter activity enabled for OutboundSync, it should look like this. Note that you see the OutboundSync logo in the timeline with more details about the events.
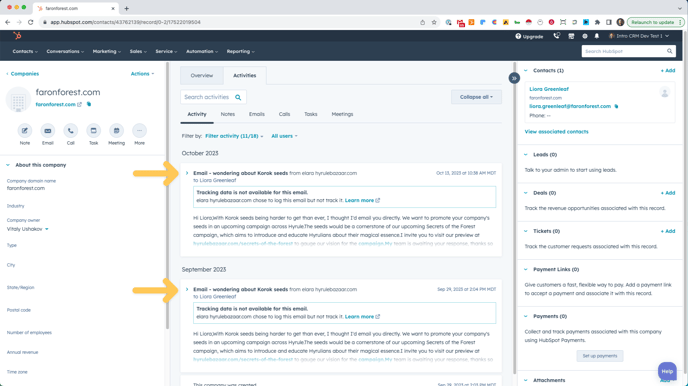
You can see what this looks like in the company record by clicking on the company name. In this case, you can see that OutboundSync is not only associating the company and contact record, it is also associating the emails with both the company and contact records.
See you in the inbox!
You should be all set. If you have any questions, please let us know.